PowerShell
How to manage Local Group Policy with Powershell
I have always encountered issues managing Local Group Policy Objects efficiently through automation. There are many situations where GPO through AD is not feasible or possible. I then found a module by Dave Wyatt called PolicyFileEditor. I use this module far more often than I ever thought I would and wanted to share this with others.
This module can be used to manage your local policies, but it can also be used to get the policies from Policy templates. An example would be the policy templates shipped with Security Compliance Manager. If you also want to set a baseline for your Local policies, you can use this module to compare your live policies to the ones in the templates. It is then very easy to go back and make a single change if a policy changes. In the screenshot below you can see the output of Get-PolicyFileEntry for a SCM Windows 10 User Policy.
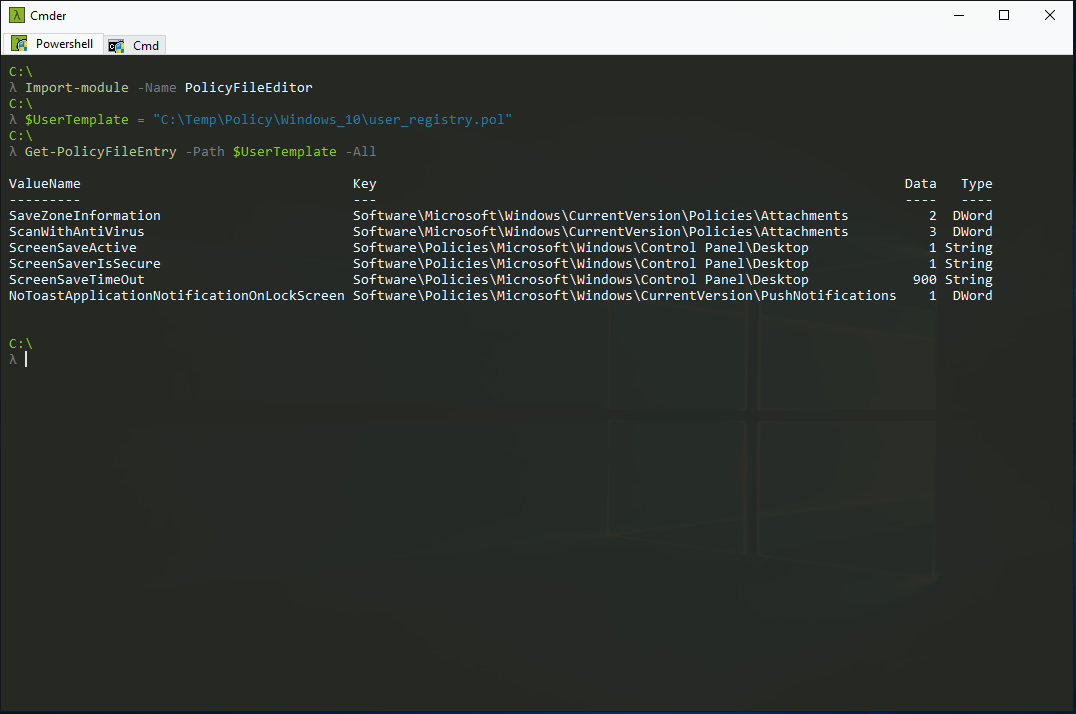
You will notice that these look very similar to Registry values. The HKCU and HKLM are left out and are replaced by the Policy type. Machine Policies for HKLM and User Policies for HKCU. To use PolicyFileEditor you first need to define the policy files you will be modifying. The ones for Local Policies are the following:
$MachineDir = "$env:windir\system32\GroupPolicy\Machine\registry.pol"
$UserDir = "$env:windir\system32\GroupPolicy\User\registry.pol"
When you set a policy you will be able to see the changes in gpedit.msc when properly set. One unique thing about PolicyFileEditor is that it can also set Policies that do not have ADMX templates. These changes will not show in gpedit.msc, but will show up when a gpresult report is ran.
When setting a policy with Set-PolicyFileEntry you first need to specify a Path to the Policy file. This would be the $UserDir or MachineDir we just defined. It then asks for a Key which is the Registry Path to the Registry setting we are targeting. We will use one of the ones from the User Policy Template from earlier. You will then need to set the Name, Value and Key type. When you put it together it is going to look similar to the following:
$RegPath = 'Software\Policies\Microsoft\Windows\Control Panel\Desktop'
$RegName = 'ScreenSaverIsSecure'
$RegData = '1'
$RegType = 'String'


Set-PolicyFileEntry -Path $UserDir -Key $RegPath -ValueName $RegName -Data $RegData -Type $RegType
Once you understand how to use the module, you then have to figure out how to target the correct registry values. You could always use something like RegShot or Process Monitor, but there are easier ways. The way I would suggest is to set up your reference policies on a machine, and then use Get-PolicyFileEntry with the All parameter. You can then export these policies with Export-Clixml and use the xml to build your new Policies.
The following screenshot shows how you can use Export-Clixml and Import-Clixml to store and retrieve the Policy Settings.
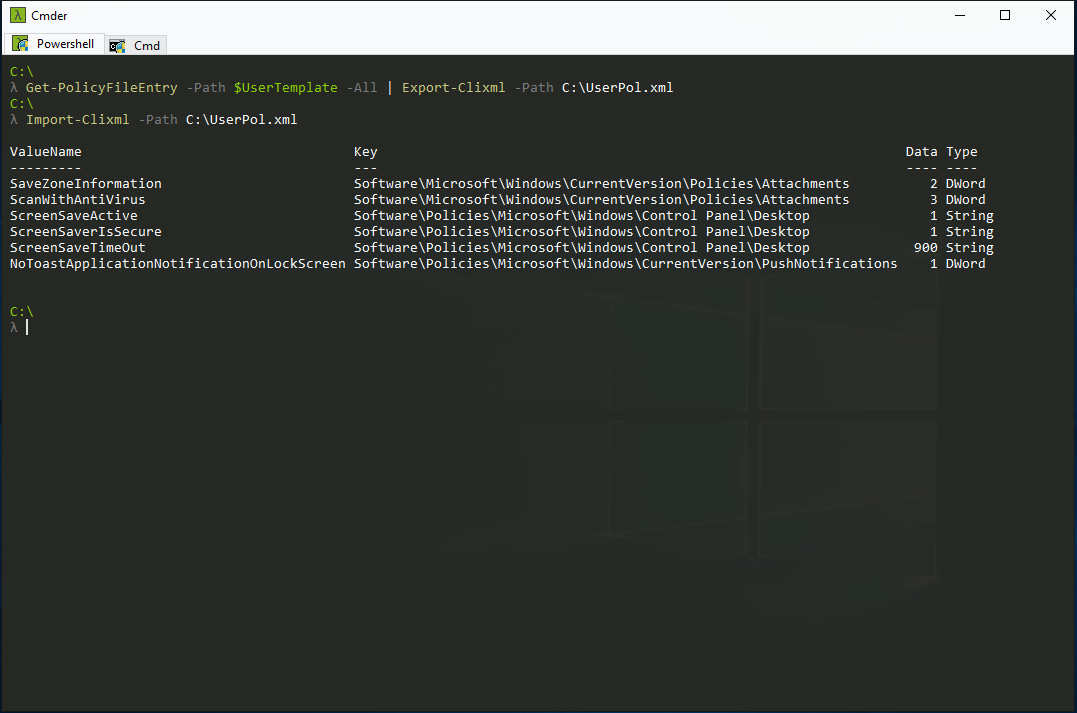
You can then use this xml file with Set-PolicyFileEntry to easily set the Policies configured on a Reference device. Here is a quick example of how you could do this for User Policies.
Import-Module -name "PolicyFileEditor"
$UserDir = "$env:windir\system32\GroupPolicy\User\registry.pol"
$UserPols = Import-Clixml -Path 'C:\UserPol.xml'

foreach ($UserPol in $UserPols)
{
    $UserPol | Set-PolicyFileEntry -Path $UserDir
}
This should get you started and I hope others find this as useful as I have. There are a number of great uses for this module and it even has DSC Resources. It can be found on Github and the PSGallery.
UPDATE: 2/6/2016
Dave Wyatt updated the PSGallery version to 2.0.1 and it contains the bug fix for the User GUID bug I encountered, so it should be fine to use either version.
Related Posts
- VSCode PowerShell · Using VSCode to Give Better Presentations
- VSCode Tips · Using VSCode Background Tasks to Automatically Run Pester Tests
- Release Pipeline · Part 2 - Development Environment
- Release Pipeline · Part 1 - Gitting Started
- PowerShell · Building a Release Pipeline
- PowerShell · Set Default for VS Code's New Integrated Terminal to 64 Bit PowerShell
- PowerShell · The Little Known PowerShell V3 Feature that Everyone should be using
- PowerShell · Getting Started with Editor Commands
- PowerShell · Having some fun with Dynamic Parameters and Rick Rolls
- PowerShell · How to manage Local Group Policy with Powershell
- Powershell · Powershell: Find and Extract Drivers that break Task Sequences in Windows 10.
- PowerShell · Creating a Custom Theme for ISESteroids
Brandon Padgett POWERSHELL
powershell GPO